Hosting Node.js applications on AWS EC2 (Elastic Compute Cloud) provides developers with flexibility, scalability, and control over their backend infrastructure. This guide outlines the steps to deploy a Node.js backend application on an EC2 instance, ensuring efficient management and optimal performance.
Step 1: Launching an EC2 Instance
-
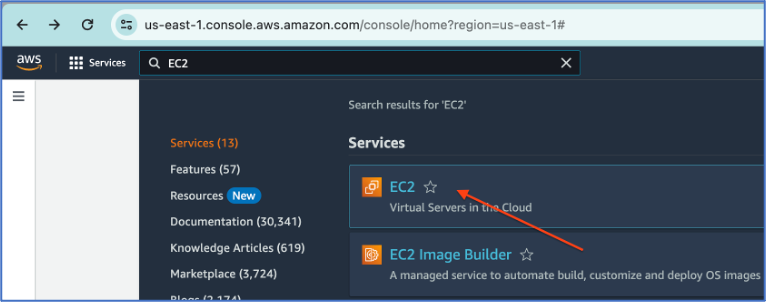
Sign in to AWS Management Console: o Navigate to EC2 Dashboard.
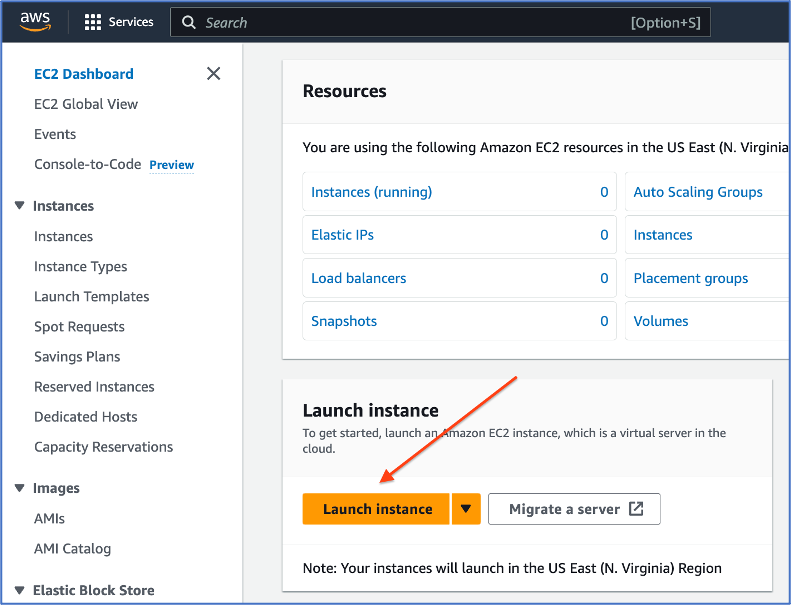
o Click on "Launch Instance" to start the instance creation process.
-
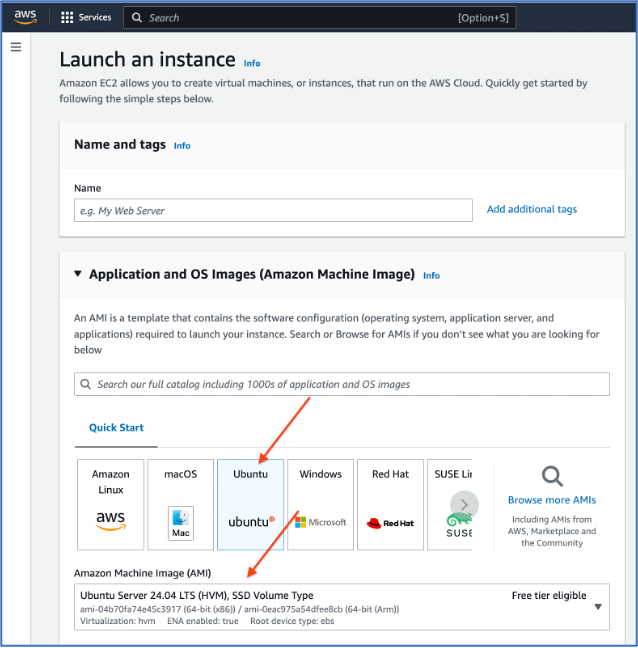
Choose an Amazon Machine Image (AMI): o Select a suitable AMI (Amazon Linux, Ubuntu, etc.) based on your application requirements.
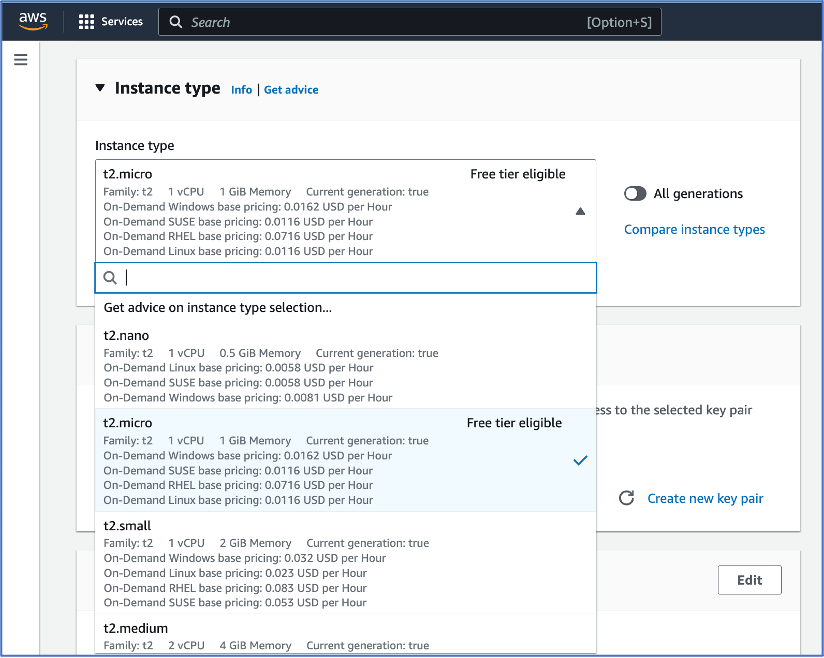
 3.Choose Instance Type:
- o Select an instance type (e.g., t2.micro for low traffic, or choose based on your performance needs).
-
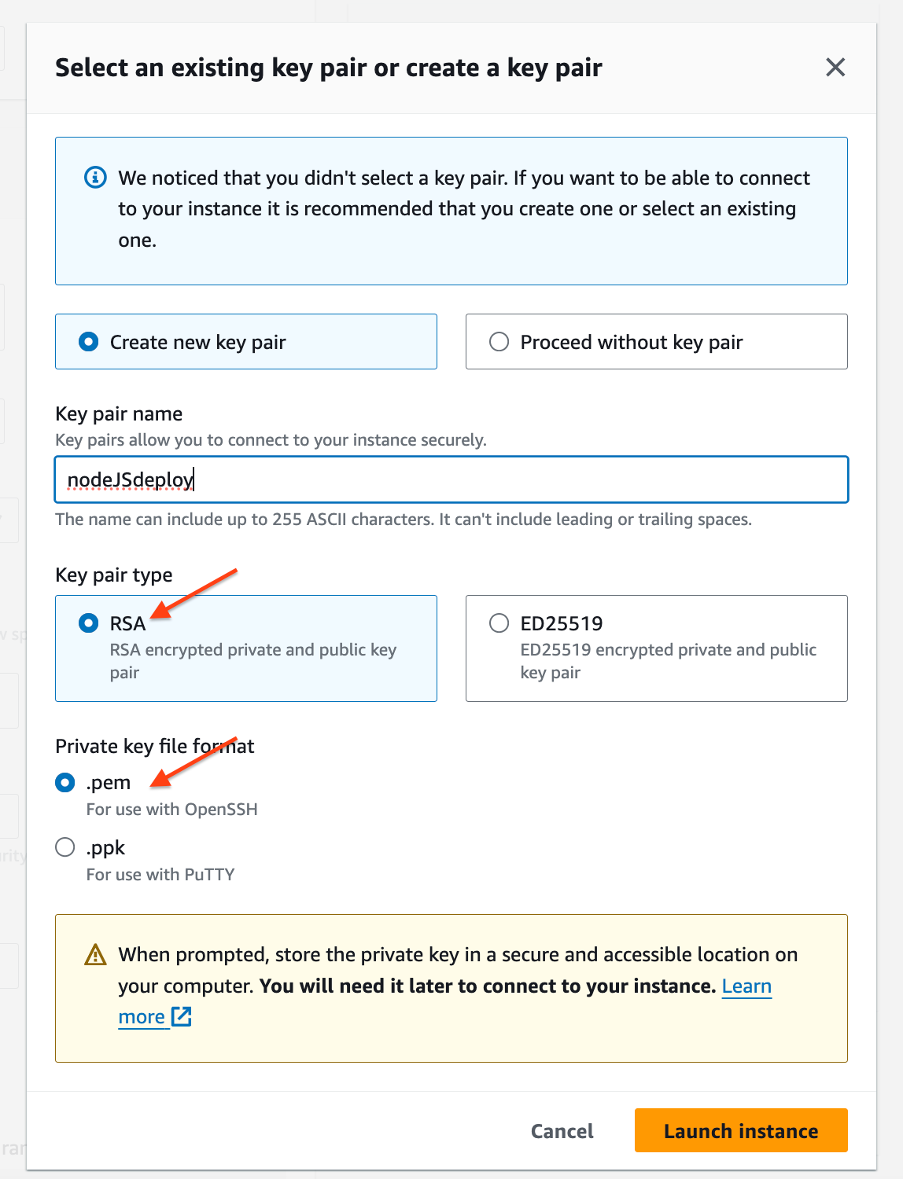
Key pair (login): o Create or select an existing key pair to securely connect to your instance.

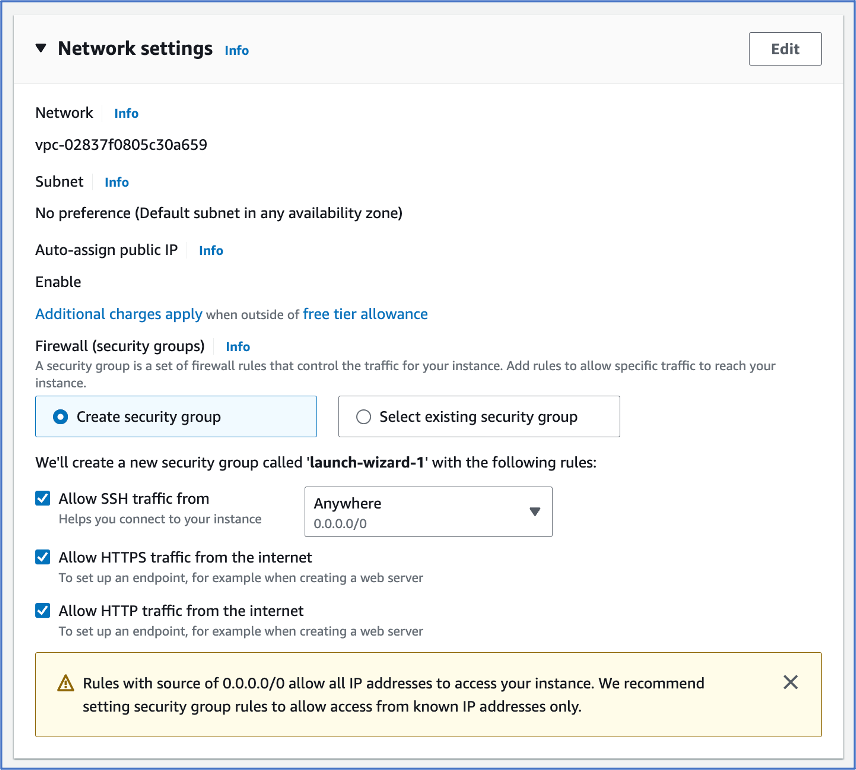
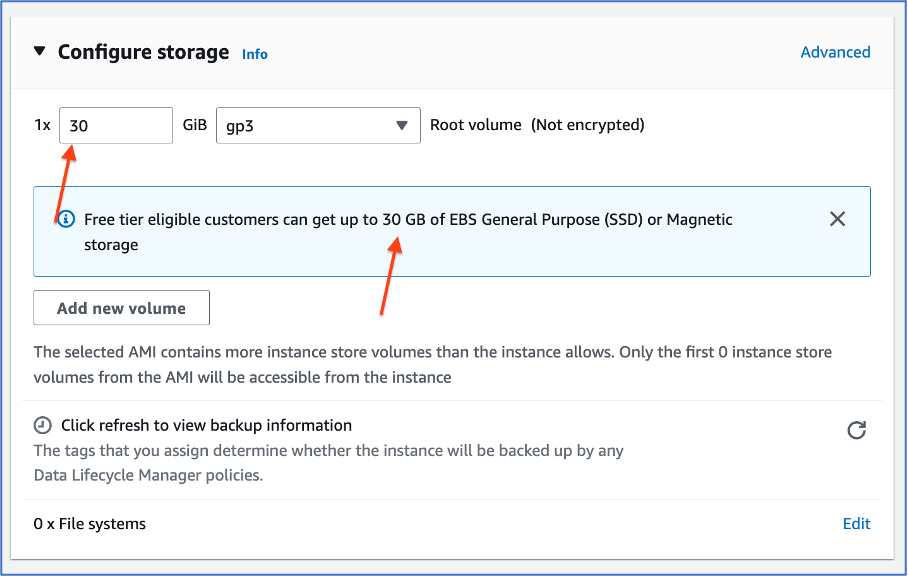
5. Configure Instance:
o Configure instance details such as network settings, storage, and security groups.
-
Add Tags (Optional): o Assign tags for easier instance management.
-
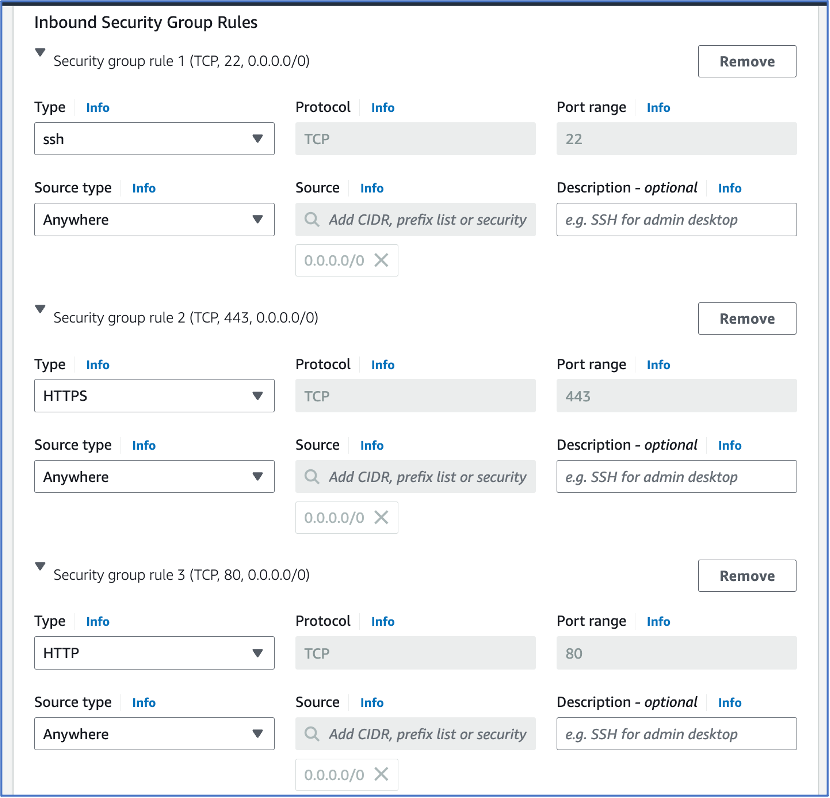
Configure Security Group: o Create or select an existing security group to define inbound and outbound rules. Ensure HTTP (port 80) and HTTPS (port 443) are open for web traffic.

8. Review and Launch:
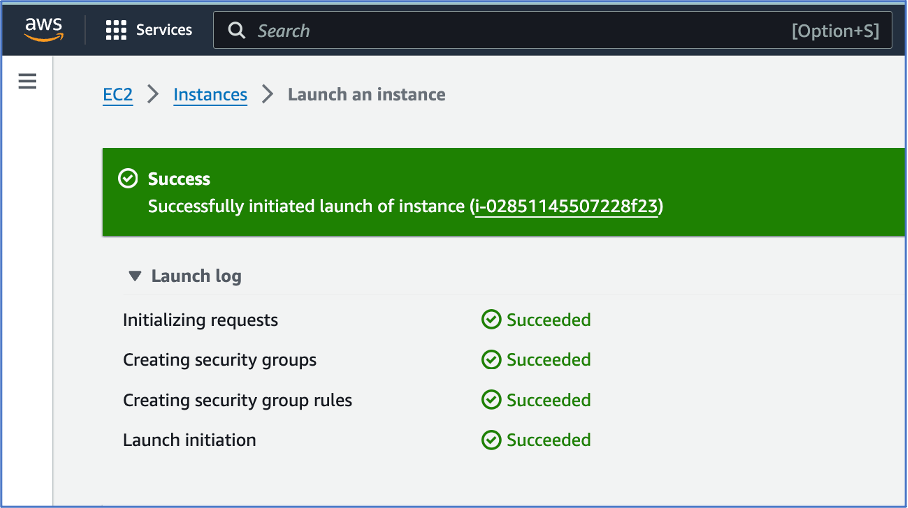
o Review your instance configuration and launch the instance.

-
SSH into the Instance: o Use SSH to connect to your instance using the key pair you downloaded during instance launch. Command 1: “ssh -i path_to_your_key_from_local_machine.pem ec2-user@your_ec2_instance_public_dns”
The PEM file won't be accessible for reading by default. You need to grant read permissions.

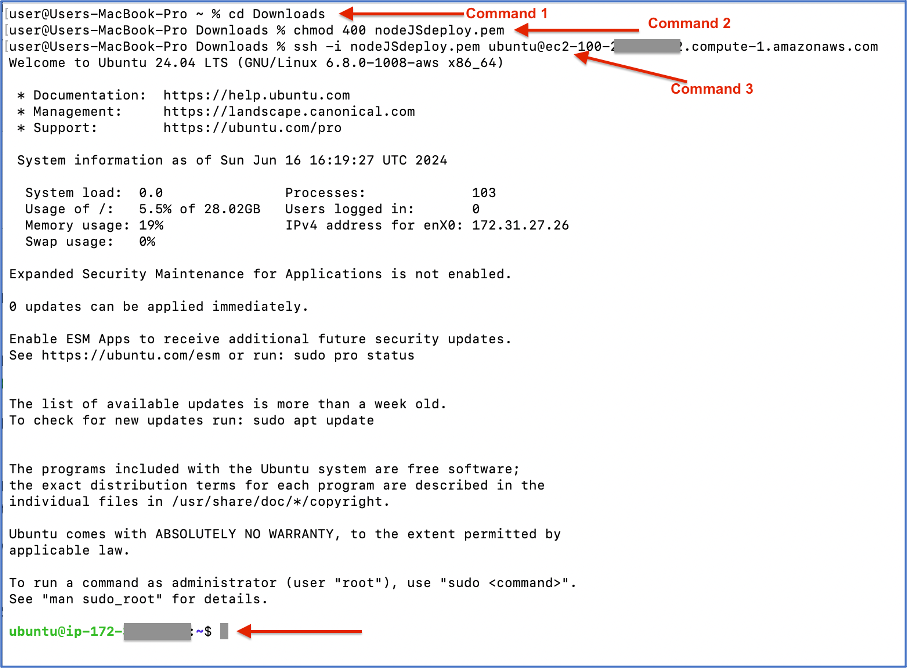
Replace path_to_your_key.pem with the path to your private key file and your_ec2_instance_public_dns with your EC2 instance's public DNS. Now, your terminal is connected to your AWS EC2 instance.
-
Install Node.js and NPM: • Update the package index and install Node.js and npm.
Command 2: sudo apt-get update -y Command 3: sudo apt-get install nodejs npm -y

-
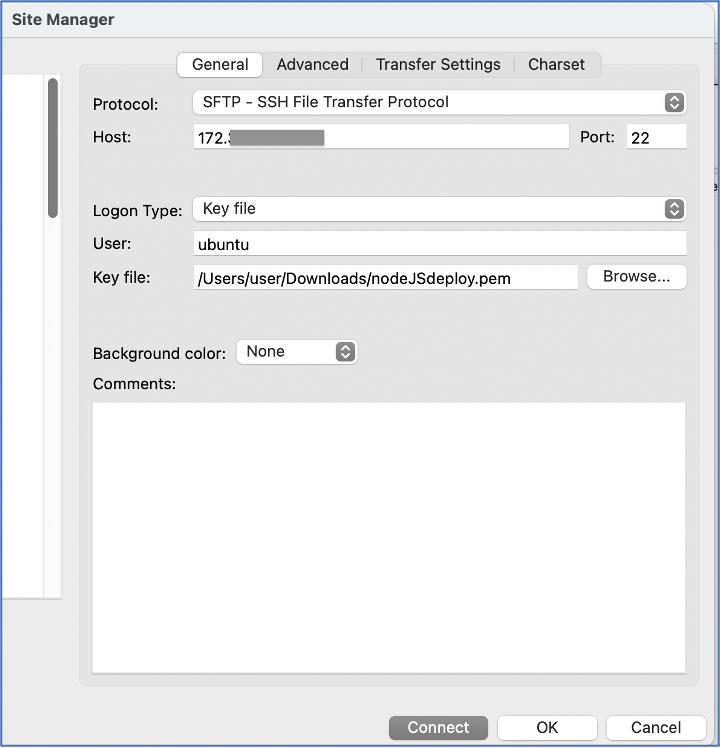
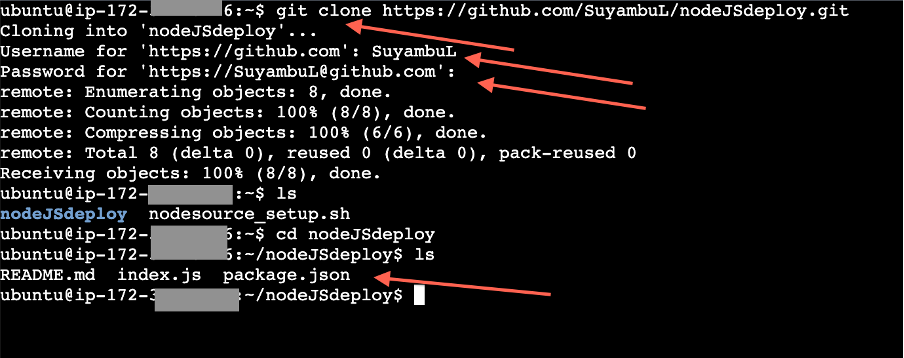
Copy Your Application Code from Git or thru FTP like FileZilla:
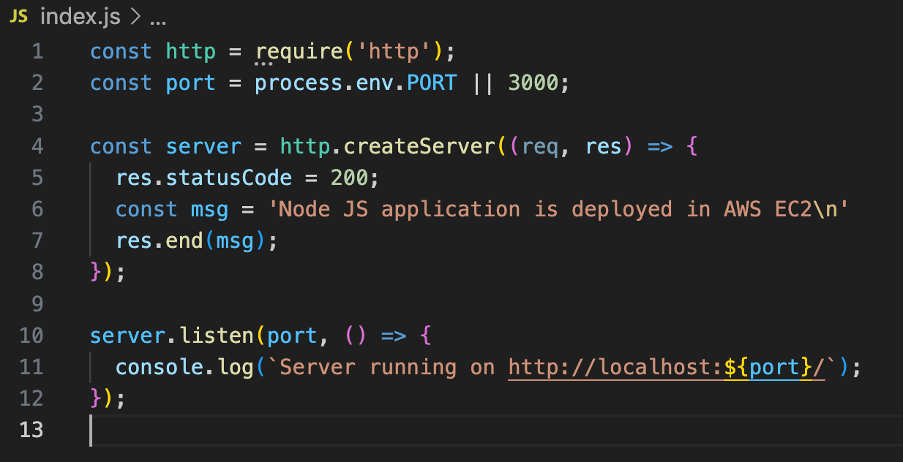
3a. Thru filezilla:
3b. Thru Git:
-
Install Dependencies: o Navigate to your application directory on the EC2 instance and install dependencies using npm. Command 4: cd /path_on_ec2/your_app Command 5: npm install or npm i

- Start Your Application: • Use node or a process manager like pm2 to start your Node.js application. Command 6: node app.js <or> pm2 start app.js <or> pm2 start index.js

-
Access Your Application: • Open a web browser and navigate to your EC2 instance's public IP address or DNS name to access your Node.js application.
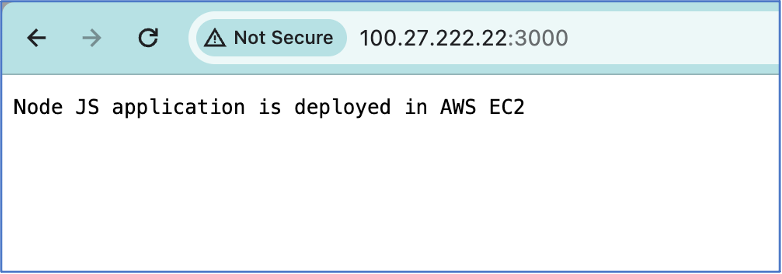
All done! Node JS backend application is deployed on the cloud.
-
Auto Scaling: o Configure Auto Scaling groups to automatically add or remove instances based on traffic patterns.
-
Load Balancing: o Use Elastic Load Balancing (ELB) to distribute incoming traffic across multiple EC2 instances for improved performance and fault tolerance.
Hosting a Node.js backend application on AWS EC2 provides a robust foundation for scalable and reliable web services. By following these steps, you can deploy and manage your application efficiently, leveraging AWS's cloud infrastructure to meet your application's growing demands.

